
Creating Intent Flows
Learn how to create and configure Intent Flows to automate customer conversations.
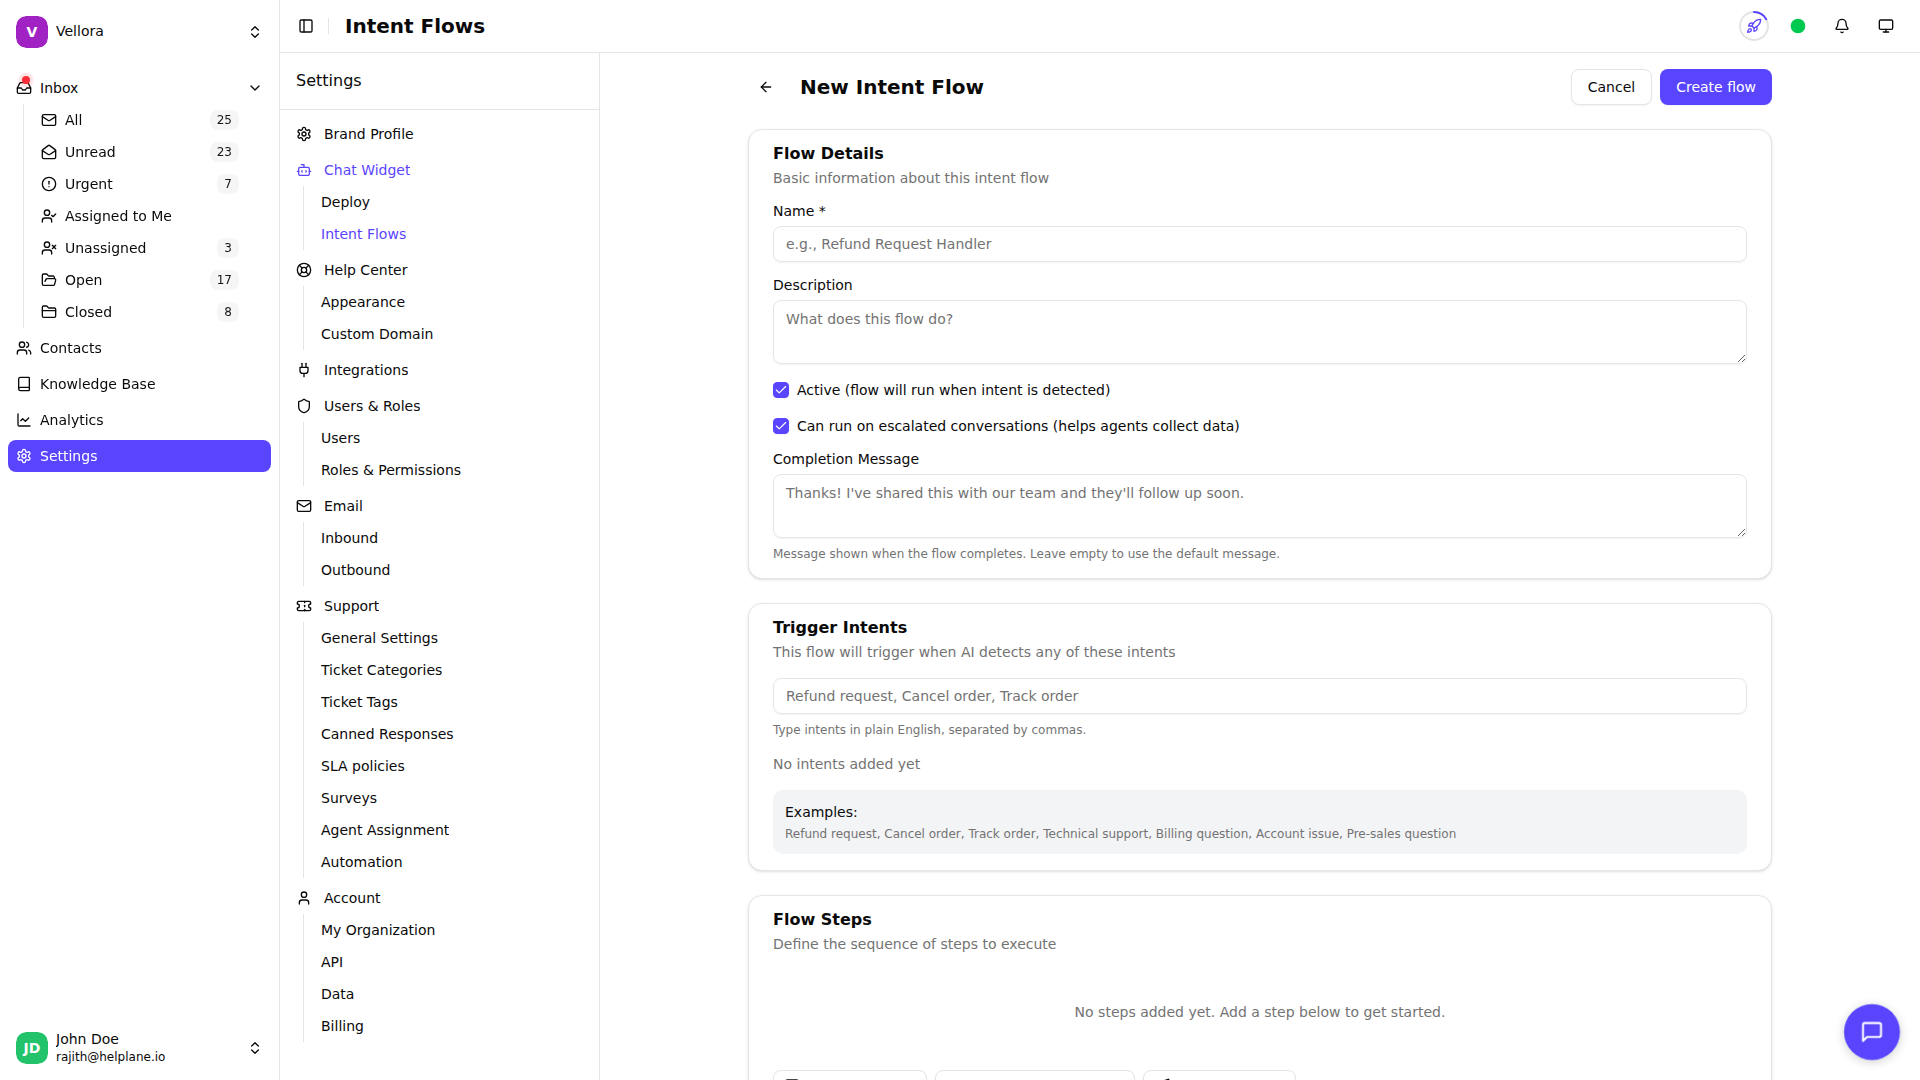
Creating a New Flow
- Go to Settings > Intent Flows
- Click New Intent Flow
- Configure your flow settings
- Add flow steps
- Click Create to save
Basic Configuration
Name Give your flow a descriptive name (e.g., "Refund Request Handler", "Order Status Check").
Description (Optional) Add context about when and how this flow should be used.
Trigger Intents Enter phrases that describe what this flow handles. Separate multiple intents with commas.
Examples:
Refund request, Cancel order, Get refundTrack my order, Where is my package, Order statusTechnical support, Something is broken, Need help
The AI matches customer messages to these intents, so use natural language phrases that describe the customer's goal.
Can Run on Escalated Conversations By default, flows can run even on conversations that have been escalated to humans. Disable this if the flow should only handle new, unescalated conversations.
Completion Message (Optional) A message shown to the customer when the flow completes successfully. Leave blank to end silently.
Adding Flow Steps
Click Add Step to add actions to your flow. Steps execute in order from top to bottom.
Step Types
Get User Input Ask the customer a question and save their response.
- Set the question prompt
- Name the field to store the response
- Use the field later with
{field_name}syntax
Update Conversation Change conversation properties:
- Add tags
- Set priority (Low, Normal, High, Urgent)
- Assign to a category
- Add internal notes
- Escalate to a human agent
Send Message
Send a response to the customer. You can include collected data using {field_name} placeholders.
Reordering Steps
Drag and drop steps to change their order. Steps execute from top to bottom.
Example: Refund Request Flow
- Get User Input: "What's your order number?"
- Field name:
order_number
- Get User Input: "What's the reason for your refund request?"
- Field name:
reason
- Update Conversation:
- Add tag: "Refund"
- Set priority: High
- Add note: "Refund request for order {order_number}. Reason: {reason}"
- Update Conversation:
- Escalate to human agent
- Send Message: "Thanks! I've forwarded your refund request for order {order_number} to our team. An agent will review it shortly."
Activating Your Flow
New flows are active by default. Toggle the status switch in the flow list to enable or disable a flow.
Disabled flows won't process any messages but remain saved for future use.