
Customizing Brand Profile
Updated Dec 15, 2025
Set up your brand's identity in Helplane.
Accessing Brand Settings
- Go to Settings in the left sidebar
- Select Brand Profile under Workspace
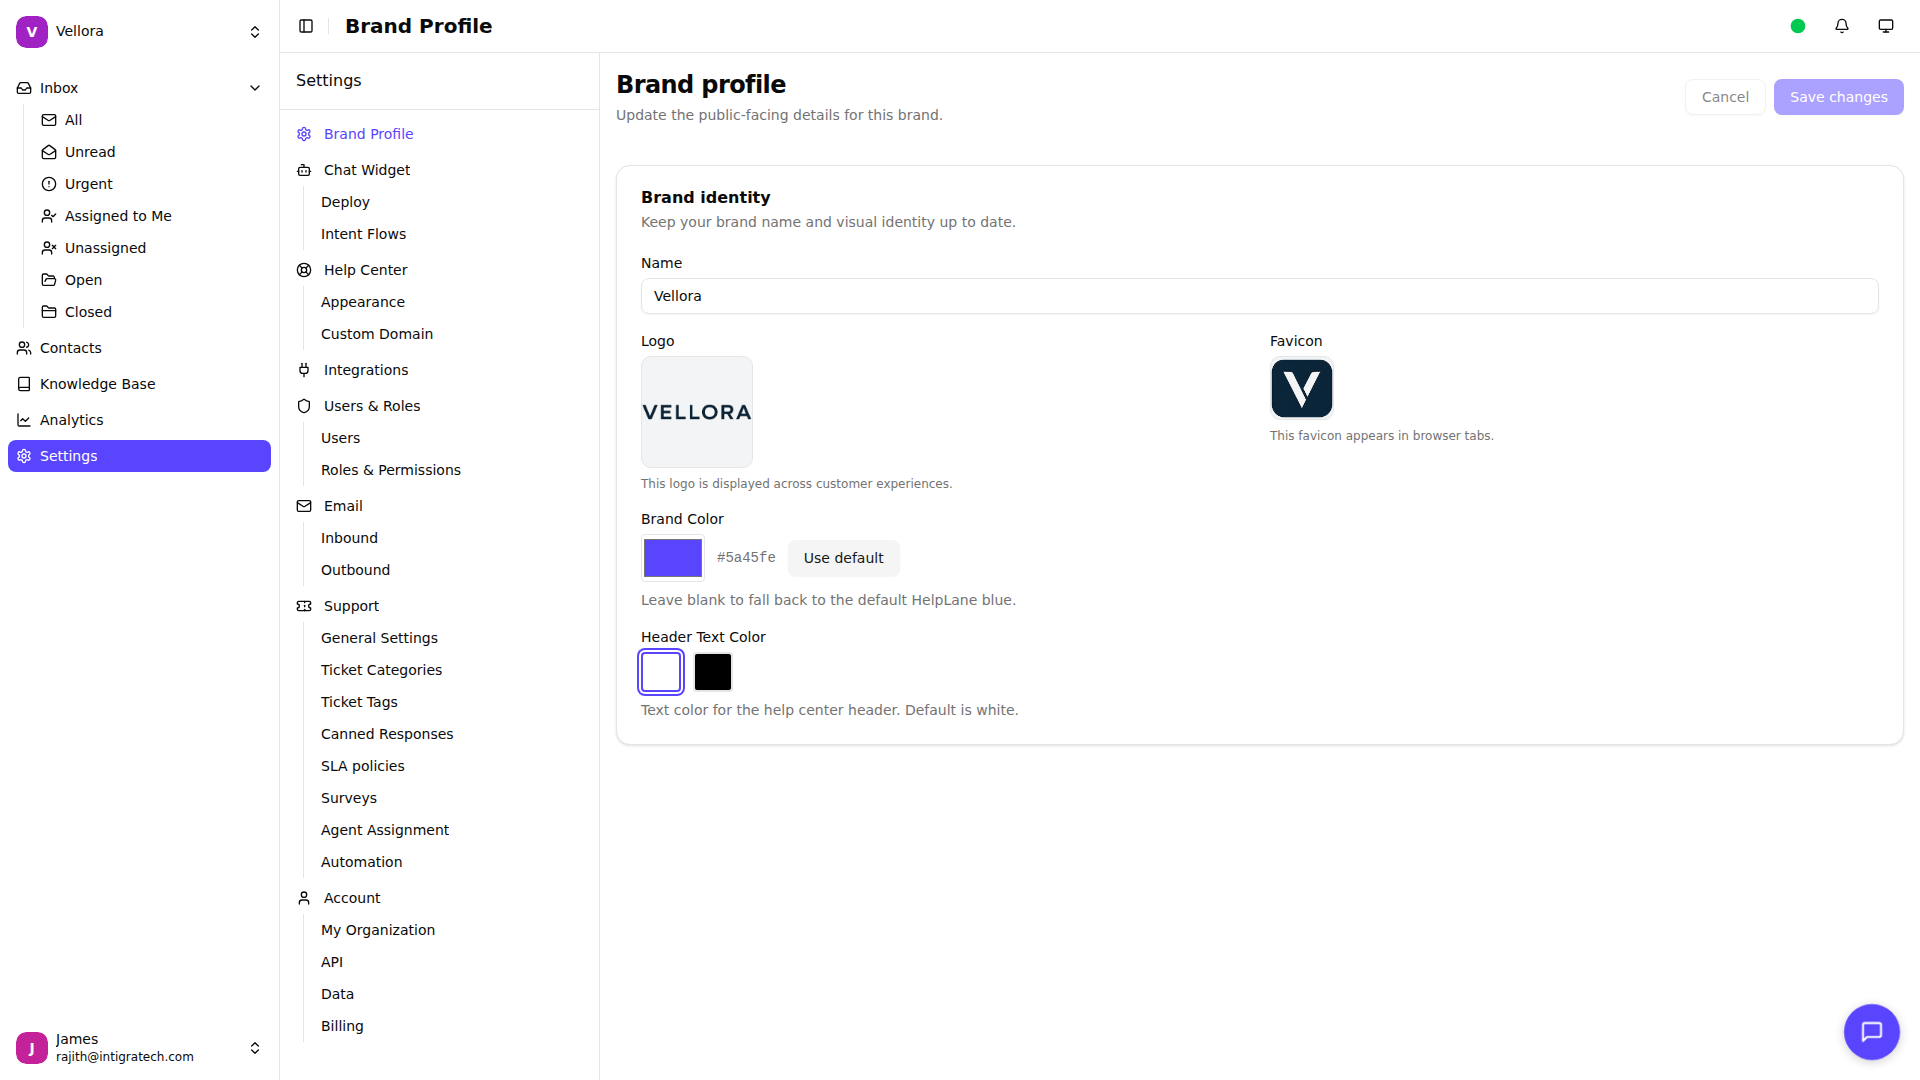
Brand Name
Your brand name appears across customer-facing experiences:
- Enter your brand name in the Brand Name field
- The URL slug is automatically generated from the name
- Click Save changes
Brand Logo
Upload your logo to display on the chat widget and help center:
- Click the logo placeholder or Edit button
- Select an image file (PNG, JPG, or SVG recommended)
- Preview the logo
- Click Save to confirm
To remove the logo, click the remove button in the logo picker.
Brand Favicon
The favicon appears in browser tabs when customers visit your help center:
- Click the favicon placeholder or Edit button
- Upload a square image (recommended: 32x32 or larger)
- Click Save to confirm
Brand Color
Set your primary brand color for buttons and accents:
- Click the color picker
- Choose a color or enter a hex code (e.g., #5a45fe)
- Click Save changes
The brand color is applied to:
- Chat widget buttons and accents
- Help center links and buttons
- Survey pages
Header Text Color
Choose whether text on colored headers should be white or black:
- Select White or Black for best contrast with your brand color
- Click Save changes
Multiple Brands
If you have multiple brands, use the brand switcher in the sidebar to select which brand to configure. Each brand has its own profile settings.